Capturing emails and blasting them with offers used to be enough.
But these days, maximizing revenue per lead is more about hitting email prospects with the right offer at the right time, a feat most believe to be technically and financially challenging.
Enter lead scoring, possibly the most underutilized email marketing feature to help you qualify prospects and increase conversions.
In this guide, we’ll look at what lead scoring is, why you should be using it, and 10 practical examples you can implement right away using ActiveCampaign.
Click any link below to jump to the relevant section:
- What is Lead Scoring And Why Should You Care?
- The Benefits of Lead Scoring
- How to Set Up Lead Scoring with ActiveCampaign
- Final Thoughts
What Is Lead Scoring and Why Should You Care?
Lead scoring is used to validate prospects using a point-based system, with a higher point count indicating a higher purchasing potential.
These points are awarded based on criteria you specify, meaning it’s still your job to understand and identify the types of leads that tend to convert for you, and come up with specific metrics to measure that potential (AKA their “sales-readiness”).
Doing this allows you to prioritize leads and send them appropriate offers at the optimal time, further increasing the chances they will buy your product or service.
So, while many marketers invest their time and resources in capturing more leads, creating more offers, and being more aggressive in closing the sale, lead scoring opens you up to an alternative approach:
Improving conversions and increasing revenue from your existing subscribers.
Why is this a more effective route to the typical “more more more” approach to email marketing?
Well, I’ll tell you…
The Benefits of Lead Scoring
The idea of prioritizing sales-ready prospects and increasing overall conversions sounds like a winner in anyone’s book, but why should lead scoring take precedent over your other marketing efforts?
These are the 3 core reasons:
- It’s low effort: Assuming you’re able to identify the types of leads that typically respond well to your offers (admittedly where most of the work is), setting up the rules for lead scoring is actually pretty straightforward process.
- It’s low cost: If you’re using an email marketing platform like ActiveCampaign already, it’s likely you won’t incur any additional costs by using the lead scoring features available. ActiveCampaign requires the Plus plan or higher.
- It’s proven: Zeroing in on a fraction of your overall prospect pool allows you to spend more of your time and resources closing prospects contribute the most revenue to your business. In fact, some have reported a 79% ROI increase after implementing lead scoring.
Here’s the good news:
ActiveCampaign allows you to create a lead scoring system that drives results, and you don’t need to be a technical genius to implement this scoring machine into your business.
You’ll also find lead scoring features available in services like Drip and ONTRAPORT. But other well known email services like MailChimp and ConvertKit lack this capability.
So how do you actually start scoring leads?
How to Set Up Lead Scoring with ActiveCampaign

ActiveCampaign is a well-rounded email marketing platform with a feature list as long as my arm, and one of those is of course the lead scoring functionality.
Unlike other features within ActiveCampaign, there is some groundwork to be done when setting up lead scoring, some of which should be done before any technical setup.
Here’s how the process breaks down (step #3 onwards is where ActiveCampaign comes in):
- Build your buyer persona
- Determine your qualifying data points
- Implement data points as rules
- Assign point values (and expiration) to rules
- Set your triggers using automation
- Test and Adjust Rules, Points or Thresholds
Let’s go through each phase of this process, step-by-step.
1. Build Your Buyer Personas
In order to get the most out of lead scoring (and any form of marketing for that matter), you need to understand your target market.
When talking about a “target market” it’s easy to imagine a group of people with a shared interest as opposed to a specific person with real needs, problems and desires.
Defining your buyer persona (or multiple personas, ideally) requires an understanding of these aspects on an individual level, whether it be through hard data or anecdotal observations.
Building your buyer persona is a huge topic by itself and one that’s far beyond the scope of this article, but I wanted to give this a mention considering how fundamental it is for correctly scoring leads.
To get you up to speed, I’ve put some of my best resources below for further reading on the topic:
- https://www.shopify.com/blog/15275657-how-to-build-buyer-personas-for-better-marketing
- https://blog.hubspot.com/marketing/buyer-persona-research
- https://blog.hubspot.com/marketing/buyer-persona-questions
2. Determine your qualifying data points
With your buyer persona or personas in mind, you’ll need to figure out what attributes tend to qualify a lead, and how strong those qualifiers are in terms of point values.
These qualifiers break down into 2 types:
Demographic qualifiers is the first, and it refers to a specific sector of the population based on their own characteristics. These would normally be submitted by the lead as a field on your lead form, and could include:
- Age
- Sex
- Ethnicity
- Religion
- Location (country or state)
- Relationship status
- Field of work
- Position of work
- Income bracket
Behavioral qualifiers is the second, and it refers to a specific action a person takes, often indicating their level of interest or commitment. These would be measured during or after capturing the lead, and could include:
- Opening an email
- Clicking a link in an email
- Responding to an email
- Opting-in for a lead magnet
- Download or viewing a lead magnet
- Visiting a web page
- Visiting a web page a specified number of times
- Spending a specified amount of time on a web page
- Registering for a webinar
- Attending a webinar
- Staying on the webinar (or minimum “drop-off” point)
- Submitting a form
How do you know what to choose here?
This is where you need to dig into the data you already have and look for any overlap between your existing customer base, not forgetting to cross-reference those with your buyer persona profiles.
Often times you’ll find at least one qualifier that broadly applies to prospects who ultimately converted to customers, such as the following examples:
- 65% of my customers opted-in for my free checklist
- 83% of my customers signed up for a free consultation
- 24% of my customers attended my webinar
It’s also worth noting that you can and should use multiple qualifiers if a correlation is found, as this will help paint a more complete picture and improve the accuracy of your lead scoring results.
Finally, smaller qualifiers can be used in aggregate, as well as disqualifiers (deducting points) if evidence supports any loss of leads as a result.
3. Implement Those Data-Point as Rules
Once you’ve decided on your data points, it’s over to ActiveCampaign for the technical implementation.
You can access your lead scoring rules by going to Contacts > Manage Scoring:

You’ll then be asked which type of score you want to create rules for.
Your options are a ‘Contact score’, which applies points at the lead (or prospect) level, or a ‘Deal score’, which applies points on the deal (or offer) level.
More information on the differences can be found here, but in most cases, you’ll be looking at the first option—the ‘Contact score’—to gauge an overall temperature of sales-readiness.

From here, you can begin adding qualifying rules to a rule group using ActiveCampaign’s “Segment builder”.
There are no limits to the number of rules and rule segments you can add here:

4. Assign Point Values (and Expiration) to Rules
Once a rule had been added, as shown above, you’ll be asked to assign a point value.
The number of points should represent the level of importance this attribute represents in terms of sales-readiness — or probability of a conversion once it becomes true.
The default value is to add 10, but you can set any number of points and even subtract points for unfavorable attributes:

An example of a rule group to use might be:
- Subscribed to primary list: +5 points
- Clicked link in “free consultation” email: +10 points
- Completed free consultation form: +15 points
Additionally, you can combine these rules with some disqualifiers to deduct points accordingly:
- Unsubscribed from primary list: -10 points
- Did not open “free consultation” email: -10 points
- Is not located in the United States: -15 points
It’s worth noting that rules themselves can only run once for a prospect, so the total sum of all points is the maximum number points a prospect can reach.
By now, you may have also noticed the ‘Expiry’ setting set to “never” by default, meaning you can choose to apply a lifespan to any points awarded or deducted.

This is useful because it allows contacts to accumulate more points by performing qualifying actions closer together and simultaneously penalizes contacts that “go dark” for longer periods of time.
It can also be used to for smaller actions that may be significant in the short-term, but aren’t a good measure of sales-readiness in the long-term.
Finally, if you’re struggling to decide on the correct point values to assign to each qualifier, consider having a conversation with your sales team or customers to gain further clarity on high vs low value actions.
5. Set Your Triggers using Automation
There’s little use in having a point-based system if you don’t have trigger in place to handle your follow up response.
For example, if a lead manages to rack up a specific number of points, you may wish to have a notification sent to you or your sales team, or even have a sales email automatically sent to that prospect.
The good news, both of these scenarios are possible with ActiveCampaign under the ‘Automations’ feature.
This is a “from scratch” automation workflow:

Clicking ‘Add start trigger’ will allow you to select from various actions, but the one we’re interested in is the “Score Change” action.
From the action settings, you can then choose which rules to apply, what the threshold point value is, and how many times the automation should run:

With the trigger in place, it’s time to add your trigger response — or what will happen when a lead meets or exceeds the score threshold.
Again, you have a number of options here, all of which are achievable through the same automation workflow.
You can be notified by email or SMS:

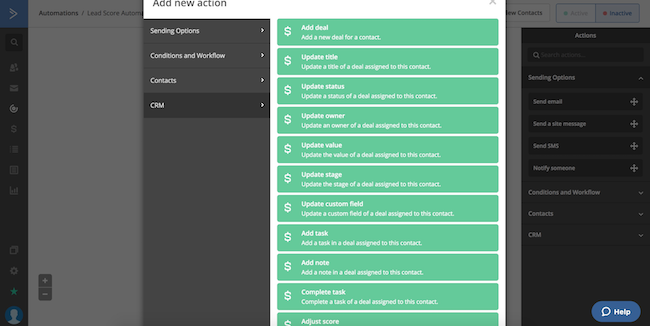
Adding this contact to the ActiveCampaign CRM (along with various other data points) for a manual follow up by you or your sales team.
Or simply sending an automated email to the contact right away:

This approach allows you to create multiple threshold for different scores and rule groups, as well as create multiple triggers for a single threshold.
As a side note: these examples highlight just how easy it is to use automation alongside lead scoring in ActiveCampaign, but it’s not the only way to use these features in combination.
ActiveCampaign also allows you to adjust a contacts score using an automation workflow, meaning it works independently of any rule group. You can do this by adding at action at any point in a workflow, like so:

6. Test and Adjust Rules, Points or Thresholds
Lead scoring should always be a work in progress and something you’re constantly refining, like any other form of marketing.
If qualified leads aren’t converting as well as you’d anticipated, that’s a sign that your lead scoring system may be a little off, but adjustments can be made.
There are several tweaks you can take to further improve a low-performing setup within ActiveCampaign.
The first to evaluate the rules—or data points—to see if they are indeed qualifying factors, or if you just assumed they were.
For example, on second look, you may find that signing up to your webinar isn’t as important as actually attended the webinar which is an entirely different qualifier altogether.
By changing this qualifier from “sign up” to “attend”, or even adding an additional qualifier to account for both scenarios, you end up with a potentially more accurate scoring system.
You can achieve this with the ‘Has Visited’ data point under ‘Site Events’:

The second is to evaluate the point values given to each rules, whether that be to decrease points or increase points.
For example, you may have overestimated the value of a prospect that visited your pricing page and awarded too many points to such a minor behavioral qualifier.
In that case, you might decide to halve the number of points associated to the rule, forcing other qualifiers to come into play before the threshold is met.

The third is to evaluate the expiry duration given to point values, perhaps reducing the duration and allowing more active prospects to rise to the top.
For example, you may decide to reduce the point duration from 1 month to 1 week for a given rule, effectively negating those points if the prospect fails to rack up enough additional points in that same time-frame.

The fourth and final tweak is to adjust trigger thresholds, whether that be to increase or decrease the number of points required.
For example, if too many irrelevant leads are being picked up, you’ll likely want to increase the threshold, ensuring that enough points are still available to meet that threshold:

Final Thoughts
Lead scoring is a powerful tool in your email marketing toolbox. And although it can take some extra time to setup, the effort is well worth it. You’ll then be able to qualify your leads automatically and adjust your marketing based on it.
Which should lead to much higher conversions and sales if done correctly.
Although, we use ActiveCampaign throughout this article, other email services do support lead scoring as well.
So either way, give lead scoring a try.
Take the ActiveCampaign 14-Day Free Trial Today