If I asked you to name an email marketing tool, what would you say?
MailChimp? Aweber? ActiveCampaign?
Like many online industries today, email marketing has been dominated by the same big players for the last decade. Which means they get promoted very heavily and achieve a lot of mindshare.
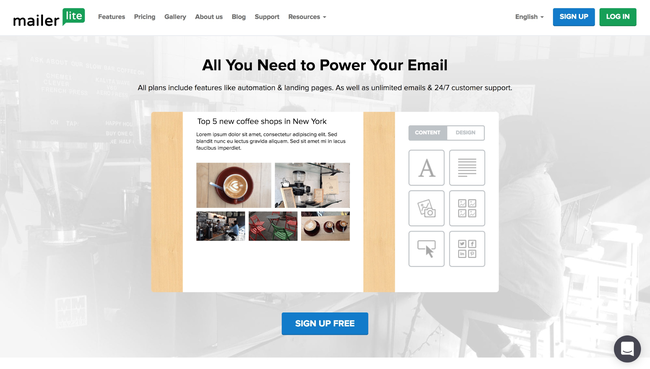
MailerLite Review
First Published on: May 24, 2018
Last updated: May 24, 2018
tl;dr Summary
Now and then, however, an underdog disrupts the market, causing long-time users to question their loyalties.
MailerLite has done exactly that.
So today, in this review, I’ll be tearing MailerLite from limb to limb to see if it really stands its ground against the big boys…
…and, more importantly, whether you should consider making the switch.
The Approval Process
Like most email marketing providers these days, you will need to go through a review process before being able to properly use the software.
When you first sign up, you’ll be asked to complete your profile.
This includes information like your company name, website, industry, address, company size, list size and even the type of content you plan to send.

Then, you need to verify your website (or domain name).
This is still part of the approval process, and MailerLite will simply ask which email is associated to that domain so they can email you a verification link.

Once you’ve completed those steps, you’ll need to wait it out.
The MailerLite team will review your application, check your website, and determine whether you’re a good fit for their service.
(In other words, they’re making sure you’re not a spammer/scammer)

As shown above, you’ll still be able to use the software to create campaigns and play with the features, but you won’t be able to send anything until approved.
I was “partially” approved within a few hours, which gave me a temporary limit of 500 subscribers.
Here’s what the email said:

Annoying, sure.
But while these measures aren’t ideal for getting started, it does help prevent unscrupulous users from hurting everyone else’s deliverability.
Subscriber Management
Having granular control over your subscribers is arguably one of the most important aspects of any email marketing software today.
Why?
Because highly personalized campaigns are necessary if you’re looking to increase opens, clicks, and, most importantly, your conversions.
And while most providers allow you to “tag” subscribers in order to target them more effectively, MailerLite uses a slightly different approach.
When you open up your subscriber dashboard, you’ll notice two options; Segments and Groups.
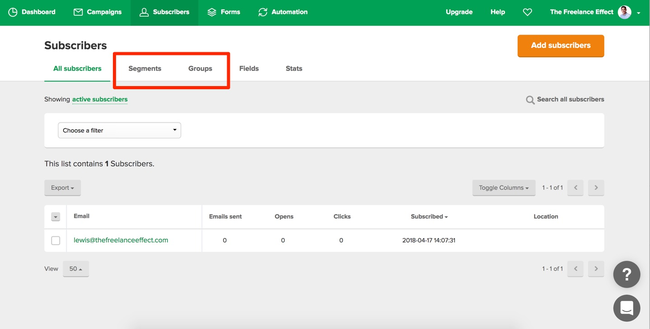
Segments are essentially rules.
Your subscribers belong to a segment only when they meet the specified rules, and will be automatically added or removed accordingly.
Here’s what setting up a rule looks like:

Notice how you can even combine rules, as well as an alternate rule if the first doesn’t exist.
Pretty smart, eh?
The next tab is for groups, and despite the difference in name, these act much like your usual “tagging” system.

(MailerLite even debated changing the name to ‘Tags’, but ultimately decided against it.)
Unlike Segments, Groups are updated manually or through an automation rule — which we’ll get to in a moment — and they have no value aside from what you actually call them.
As you start to use this platform, you’ll begin to understand where Segments and Groups are typically used, but MailerLite offers a hand in case you’re unsure:

Basically, groups are more of a deliberate action on a per-subscriber basis, whereas Segments allow you to lump multiple subscribers together based on a common denominator.
A tad confusing, I’ll admit… but I feel it’s a fair trade-off for the added flexibility. Besides, they are optional.
Finally, the ‘Fields’ tab is used to personalize your email copy.

You’ll notice that MailerLite has already populated this area with their own fields, such as name, company, and country.
If you want to create your own custom fields, you can do so by clicking the ‘Add new field’ button.

So how do they actually work?
You can either upload a CSV file of your subscribers along with your custom field data in separate columns… or can simply add these fields to your forms which will only apply to future subscribers.
Here’s a screenshot of a test field I created and added to a form:

I won’t go too much into the form stuff here since I have a whole section on that below, but this is the approach I’d recommend if you wanted to use this feature.
Again, once you’ve collected your custom field data from new subscribers, you can pull them into your email content and subject line.
Just click the ‘Personalization’ drop down and select your custom field.

I’m barely scraping the surface of what’s possible with custom fields, but it’s important to know this is a feature you can use.
Overall, it’s fair to say MailerLite has their subscriber management and personalization features on point.
Email Campaigns
If you’re anything like me, you’ll rely on automations to handle the majority of your email marketing.
(We’ll get to automations soon, don’t worry.)
But whether it’s a new blog post, podcast, or timely announcement, there’s always some excuse to send a more immediate email.
That’s where ‘Campaigns’ come in.

Clicking the new ‘Create Campaign’ will give you several options.
- Regular campaign: A traditional broadcast email.
- A/B split campaign: Multiple email variations, including subject line, from name and, yes, even email content. (Woop!)
- Auto resend: Resend to subscribers who don’t open your broadcast email, with the option of changing the subject line and email content.
- RSS campaign: Create a recurring campaign that sends new content to subscribers using your website’s RSS feed.
Aside from a few additional options, most of these will follow the same step-by-step process of a standard campaign.
So let’s walk you through it.
Once you click to create your campaign, you’ll be asked to select a preferred editor, whether that be the drag n’ drop, rich text or HTML.

Otherwise, you can switch to the templates tab and select from one of their pre-designed email templates — which will move you into the drag n’ drop editor by default.
At the time of writing, there are 21 email templates to choose from which is a little on the low side, but the designs are super modern.
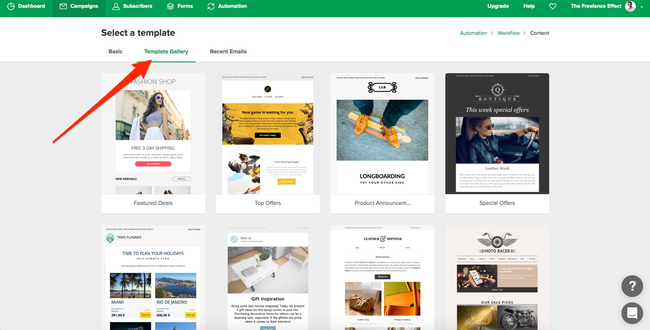
And, of course, if you’d just like to reuse a previous email, you can click on the ‘Recent Emails’ tab.
For this example, I’ll select the first template in the library.

The editor is easy to work with, which makes customizing these templates a 5-minute job.
You can also use the blocks in the sidebar to add different types of content to your email, including videos, product columns, and social links.
After making your changes, just click ‘Done Editing’ and you’ll be taken to the recipients’ options where you can select your groups or segments.

The advanced tab also allows you to build segment-like rules on-the-fly, in case your targeting isn’t quite right.
Finally, right before sending, you’ll get to the ‘Schedule’ screen.
This is where you control when your broadcast email should go out, whether that’s immediately, at a set time/date, or according to your subscribers time zones.

Impressive, right?
The Form Builder
Unlike some email marketing tools, MailerLite actually offers a decent set of form building tools.
Not only that, but you can also create popups and landing pages through this same interface, so there’s a lot to cover here. 🙂

Let’s start with your bog-standard embedded form.
These forms are first created inside MailerLite in order to get an embed code, which you can then place on your website to display it on specific pages.
Despite starting off super basic, the form designer allows you to customize everything from the form style, fields, background, title, input fields and, of course, the button.
Form text can also be edited directly, which gives you a chance to visualize your copy in real-time.

It would’ve been nice to have some templates here, but as you know, there’s more to a form than just its appearance.
Clicking the ‘Settings’ tab will allow you to configure how the form functions, including adding additional fields and setting a custom success page.
(There’s even a GDPR compliance option. Sweet.)

And speaking of the success page…
…MailerLite also lets you customize the default message, which will replace the embedded form and prevents users from redirecting.

Last but certainly not least, you can check how your form displays on mobile by switching the toggle to responsive mode.
You won’t be able to make any design changes here, but it makes sense to check, nevertheless.

So that’s an overview of the embedded form but as I said before, you can also create popup forms in MailerLite.
While the majority of this setup process is identical, there are still a few differences I’d like to point out.
Unlike embedded forms, you can choose between a set of templates:

While this isn’t the most comprehensive selection, they do offer a good foundation to work from and the editor is just as easy to use with this form type.
Clicking on the ‘E-commerce’ template takes me to a preview before moving into the editor.
Here, you’ll notice there are some new options under form types this time around:

Considering paid tools like Thrive Leads exist for ribbons and slide-in forms, it’s pretty impressive to see this level of control over popup forms.
And, as before, you can play with the styling options to get it matched up with your branding.

Finally, you can choose the close behavior of your form under the ‘Settings’ tab.
The default option is the X icon, but you can swap this out for a “No thanks” text option, or have both.

This is where most email marketing platforms would leave you, but MailerLite has one more trick up its sleeve.
Landing pages.
If you’re not impressed by what you’ve seen so far, then perhaps the page builder will tickle your fancy.
After selecting ‘Landing Pages’ from the forms page, you’ll be able to select from 8 pre-designed templates.

Again, while the template selection isn’t winning any awards, it does offer a great foundation to work from if, like most of us, you don’t have that natural eye for design.
I went ahead and selected the ‘Lead Generation’ template, though they all ultimately do the same job; collect an email address.
This time, the editor will give you 17 building blocks to further build or change your landing page.

Now, I’ve used my fair share of visual page builders, and this is already better than some dedicated solutions *cough* WPBakery.
Along with the basic building blocks, you can use elements like hero sections, popup buttons, testimonials and countdown timers.

No, it won’t be replacing landing page builders like Thrive Architect or LeadPages anytime soon, but credit where credit due, this thing over-delivers on all three form types.
Automation
What’s email marketing without a dash of automation?
For many reading this, MailerLite’s automation capabilities could easily make or break this review.
The good news? If you’ve ever used a visual workflow builder, you’ll immediately feel at home here…

Much like the rest of MailerLite, the automations interface is simple, clean and easy to navigate — something that certainly can’t be said for every email marketing software.
After setting your trigger, you can begin adding steps to your workflow.
These steps can be anything from sending an email, adding a delay, a conditional split, or an action, such as moving a subscriber or updating their records.
Here’s a simple workflow I put together, where subscribers are unsubscribed if they don’t open my email within 7 days.

There are countless possibilities when it comes to workflow automations like this, and MailerLite should have no trouble with the vast majority of use cases.
Granted, it’s not quite as feature-rich as something like ActiveCampaign since it lacks some of the conditional elements. (Split, Go To, Goal, etc.)
For example, there’s currently no automation for moving subscribers directly into another automation.
That being said, most of these actions can still be achieved by moving subscribers into different groups that trigger new automation workflows. It’s just not as efficient…. yet.
Another question of efficiency here is when creating new emails from the automation workflow builder.

After adding an email block to the workflow, you’ll be asked to add your subject line which then appears on the block itself.
From there, clicking the ‘Design email’ button will fire up the editor:

Now, you’ll be temporarily redirected to the standard campaign creation wizard, which I covered earlier in the review.
This time, however, once you’ve created your email, clicking the ‘Done editing’ button will direct you back to the automations workflow instead of the usual sending options.

Finally, your email will be loaded into your automation.
A nice touch here is having a thumbnail preview of your email within your automation block, so you can get an idea of what it contains at a glance.

While this process may seem like a grind on paper, it’s actually much faster than what I’m used to with other email marketing tools — ActiveCampaign being a great example.
On the other hand, if you’ve come over from something like ConvertKit where the editor is loaded inside the automations builder, you’ll likely find this a downgrade in performance.

It’s fast enough for me, personally, but I guess it’s all relative. 🙂
Before I wrap up this section, there’s one type of automation you won’t find in MailerLite, and I think it’s important to highlight.
Site tracking.
The ability to trigger an automation (or step) based on how subscribers interact with the pages on your site.
This kind of behavioral targeting just isn’t available in MailerLite right now, so if it’s something you use or plan to use, you might want to skip this one.
Tracking & Reporting
Like most tools, you’ll find a summary of your campaign statistics in the main dashboard.
Here you’ll see everything from campaign open and click data, subscriber growth, automation stats, and form signups.

Clicking into any campaign will give you specific reporting for that campaign.
This is where you’ll find some more advanced statistics such as unsubscribes, spam complaints, bounces, reading environment, email client and more.

This should be plenty of information for the average user…
…but if you really want to dig into the numbers, you can click into individual areas of this report for a more detailed breakdown.

You can find some real gems under these reports.
For example, the ‘View Email’ tab also displays a click map, so you can see exactly how your subscribers interacted with your emails in relation to one another.

Reports for automations are also available under the ‘Automations’ tab, though I found these to be less insightful than campaign reports.
Here’s a quick example:

Overall, MailerLite does a stellar job with their reporting interface, and most will find the available statistics more than enough to meet their needs.
MailerLite Pricing
The cost of MailerLite is no doubt one of the tools biggest selling points, and let’s face it, we all love a good bargain.
For starters, they offer an unlimited free plan that includes all features (including premium) for up to 1,000 subscribers.

While there is some subtle branding on your emails using this plan, it’s still an amazing option for those starting out.
And what about the premium plans?

It turns out, at around half the price of the competition on average, MailerLite is by far one of the cheapest options on the market. Plus, if you are willing to pay annually, you can also get an even better discount.
In fact, I haven’t been able to find anything that does the same job, cheaper.
Conclusion
MailerLite is one of the few email marketing tools to disrupt the (very crowded) industry in recent years, and that’s no easy feat.
While it’s not as fast as ConvertKit, or as feature-rich as ActiveCampaign, or as template-heavy as MailChimp, it performs exceptionally well at just about anything you can throw at it.
All in all, I find MailerLite strikes the perfect balance between flexibility, simplicity and speed, and all at a price point you’ll seriously struggle to beat.
Thinking of giving it a spin? Let us know how it works for you in the comments.
MailerLite Pros
- Uses tag-based system (called Groups)
- Powerful segmentation using rules
- Custom fields for advanced email personalization
- Advanced campaign types (auto-resend, A/B, etc.)
- Easy to use email builder/template editor
- Practical email elements such as countdowns and product boxes
- Intuitive form, popup and landing page builder
- Supports automations using visual workflows
- Offers both digestible and in-depth reporting
- A fraction of the cost compared to most other solutions
MailerLite Cons
- Strict approval process
- Few email templates available
- Very few form templates available
- Can’t create emails without leaving the visual workflow builder
- No support for site tracking
Very in-depth review Lewis! I’ve been using the MailChimp forever plan for awhile now, but it looks like MailerLite would be a good alternative.
I really dislike MailChimp’s automations, and it seems like MailerLite offers a decent solution. I think I might give it a try! Thanks!